Timeslot Creator
Applicable to:
Airtable Teams and higherRequires an Airtable Teams and above account as it uses "Run a Script" in Airtable Automations
Example use case
Creating Timeslots Automatically in Airtable
One of the primary challenges encountered in developing an appointment scheduling system using Airtable is the automation of timeslot generation. In this article, I will demonstrate how this obstacle was overcome using the Timeslot Creator script.
Let's create an Airtable form that allows users to book 30-min timeslots. The final product should look something like this:
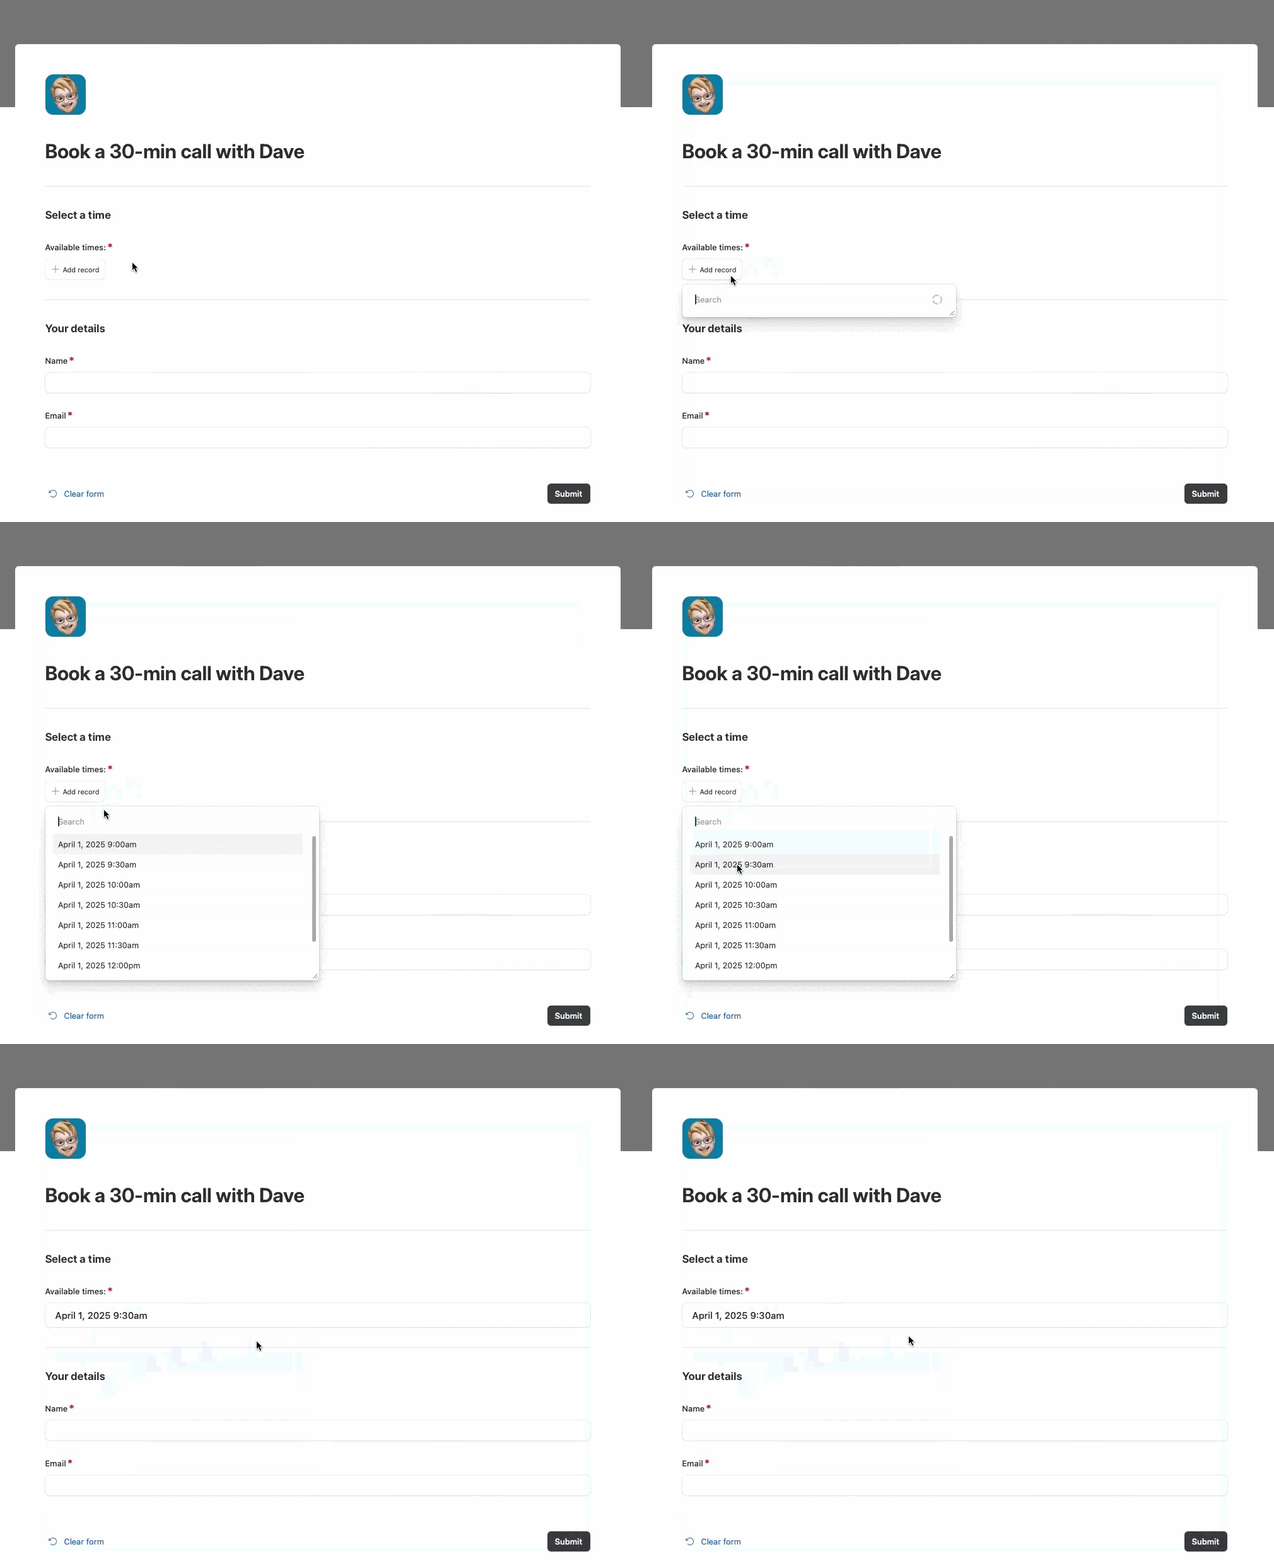
- A list of 30-min timeslots for users to choose from.
- Users can type in their name and email. That way, we'll know who's making the booking. Easy-peasy!
You can follow along this article by duplicating this example base. Click here to open the Timeslot Creator base.->
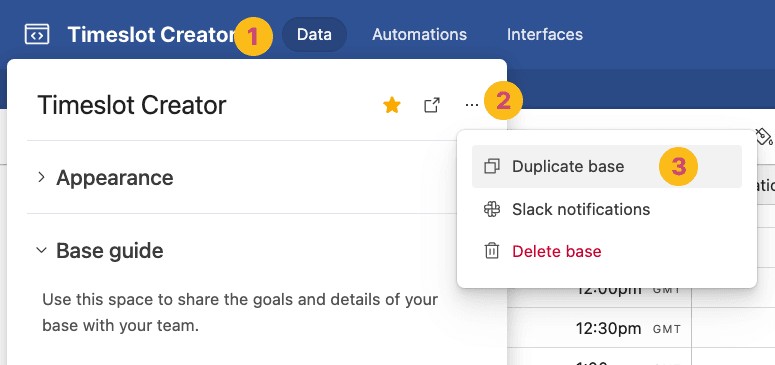
Within the base, click on the title on the top left corner > options (°°°) button > "Duplicate base" button to save a copy of the base to your own workspace. There, you'll have access to all the tables, automation, and form.
Our setup requires the configuration of three key tables:
1. Days table
The Days table is populated by records of days and times available for bookings. For example, on 1 April 2025 from 9:00AM to 1:30PM. I also specify a duration, "0:30". The Timeslot Creator Script will take this information and create nine 30-min timeslots within 9:00AM to 1:30PM in the Timeslots table.
2. Timeslots table
As mentioned, here are the timeslots created by the script. We have the Start date & time—indicating when a timeslot begins, and Duration—the length of the timeslot. Lastly, a Bookings field that links to the Bookings table.
3. Bookings table
This is the table we'll be using to populate our Airtable form. We have the Name and Email fields, for users interacting with our form to enter their details, and a Timeslot for them to choose.
Setting up the automation and script
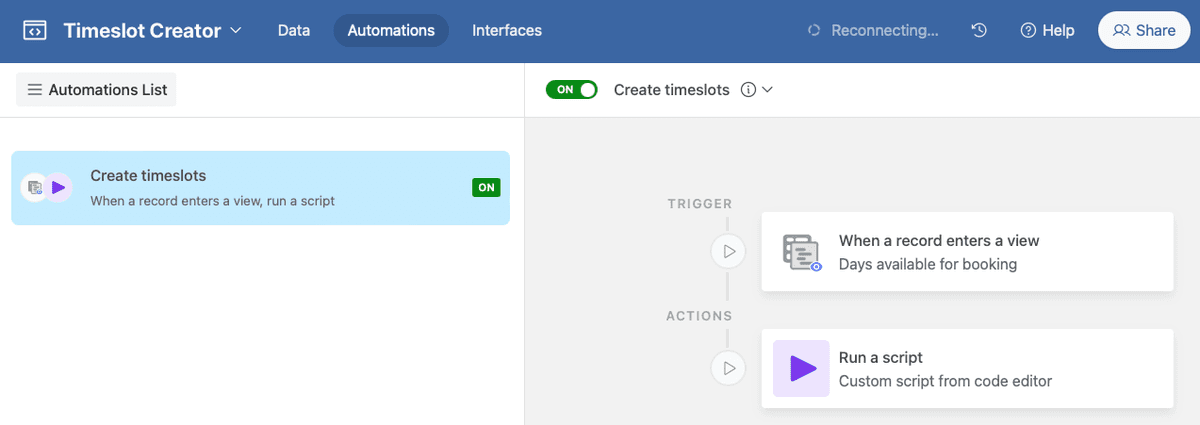
Automation trigger
In our Automations tab, you can see that we have a "Create timeslots" automation created.
Our automation will be triggered when there is new record in Days table's "Days available for booking" view.
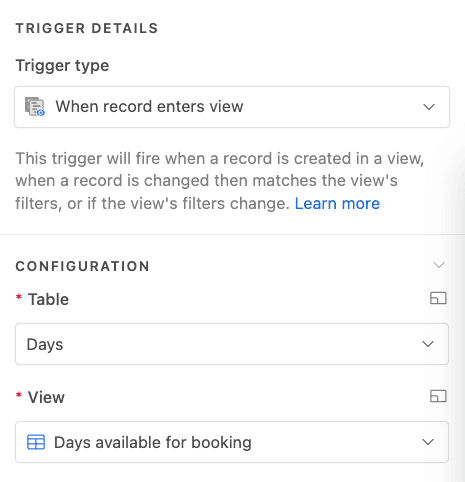
It's set up this way so that we have more control over when we want our timeslots to be available for booking. Personally I don't want users to be able to make bookings 3 months in advance. However, it is completely up to customize your trigger.
Run Timeslot Creator script action
With the Trigger set up, we can add the "Run Script" Action. By clicking on the "Edit Code" button, we can add a new input variable. We'll call it recordId, and set its value to "Airtable record ID".
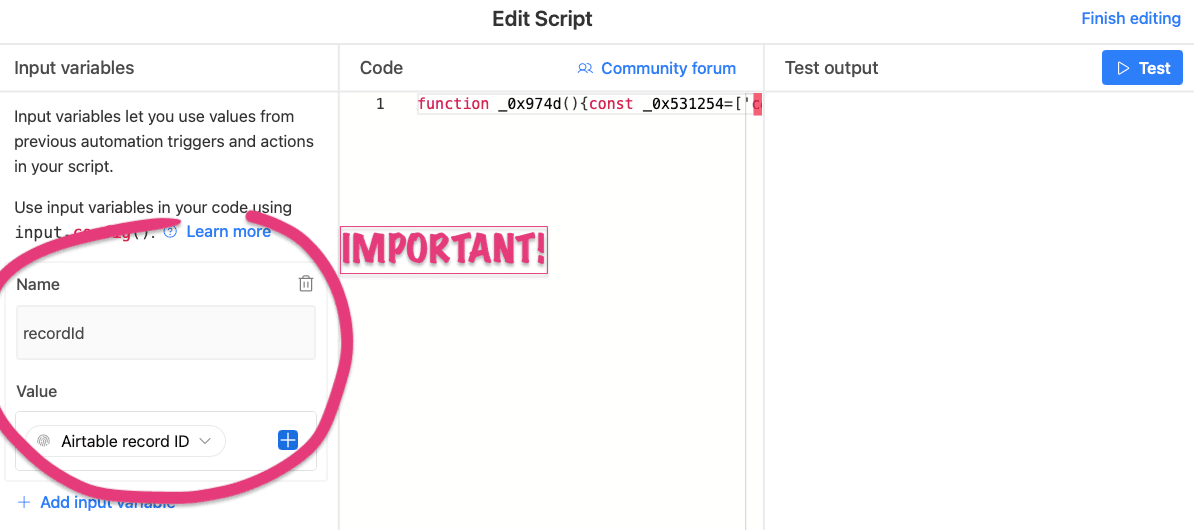
In the "Generate Script" section at the bottom of this page, click on "Submit" to get access to the script. Copy and paste it into the Code editor in Airtable as pictured above.
The table and field names have been pre-filled to match the names in the example base. You can, of course, make changes to the names, but make sure that the names on Airtable always match their corresponding ones in the Generate Script form. ⚠️ Failure to do so will lead to the script not working as intended! ⚠️
Leave "license key" blank to test the script out before making a purchase. You're allowed 25 free runs per month.

Click on the "Test" button to run the script! You'll be prompted to select a test record in previous trigger step if you haven't already.
If there are errors with the way you've set up your data, the test will show the relevant errors. For example, if you've set your start date-time after your end date-time, the script will not be able to detect a valid time range to make timeslots for you:
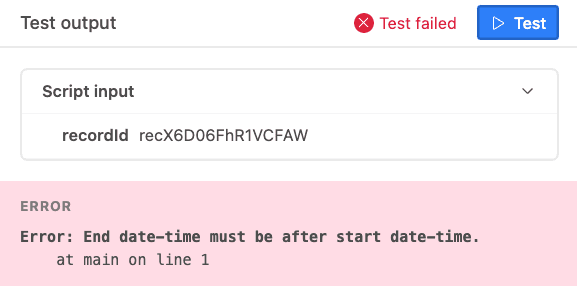
Fix the errors accordingly. If any messages are unclear, you can reach out to us via our contact form.
Now, take a look at the Timeslots table. The newly created timeslots will show up here!
Finalising the form
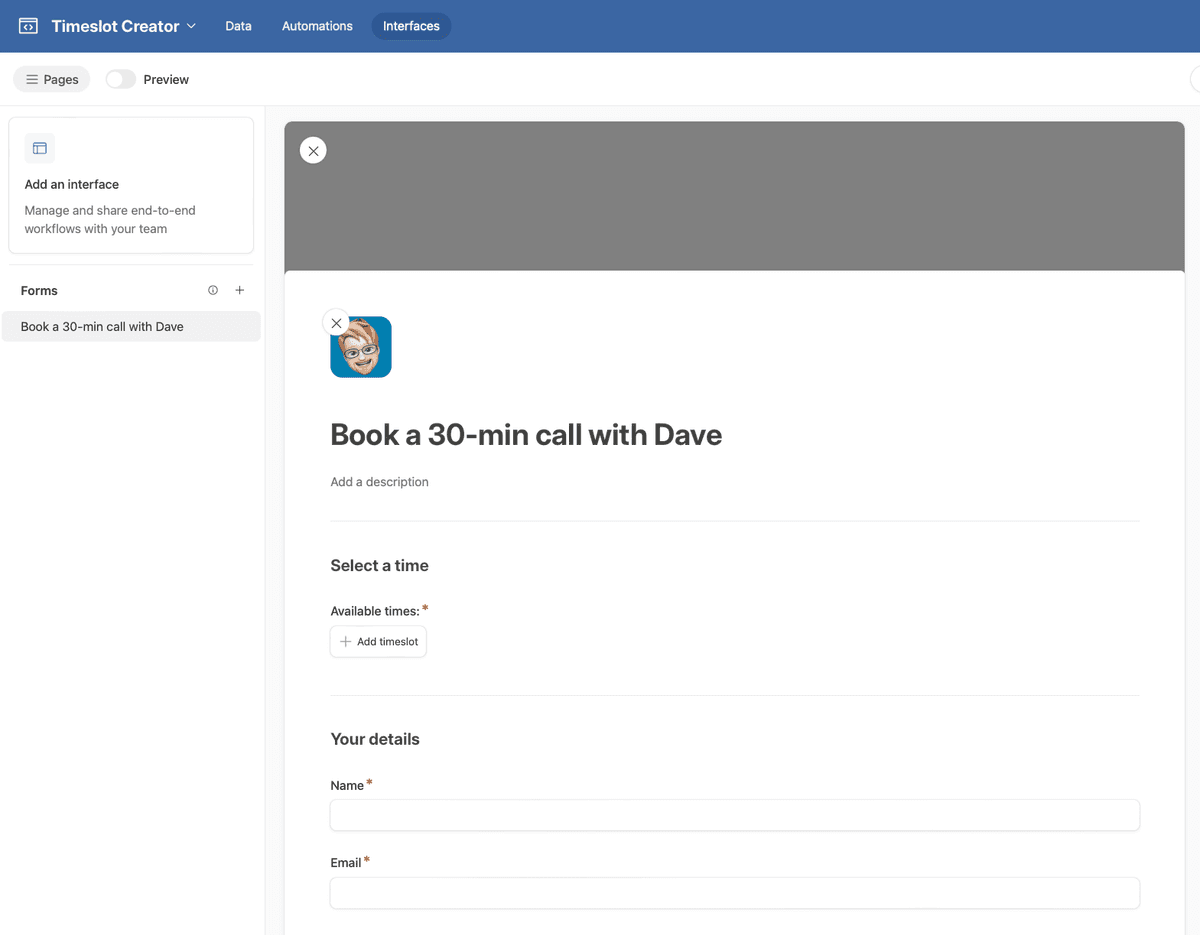
In the Interfaces tab, you'll see a form template that has been created for you. It allows user to select timeslots from the Timeslots table we've just created in the previous step. We've also added a condition so that timeslots that are in the past will not appear.
You can customise and add rules and conditions to the form as you'd like. Hit the "Publish form" button, and you're good to go!