Airtable Change Tracker
Applicable to:
Airtable Teams and higherRequires an Airtable Teams and above account as it uses Airtable Extensions / "Run a Script" in Airtable Automations
Example use case
Keeping a history of automation changes
We frequently use automation to update our Airtable data. Tracking these updates over time can be a hassle with Airtable's row history feature. This tutorial will guide you through setting up a change log to record every update made by your automations.
By the end of this tutorial, you'll be equipped with:
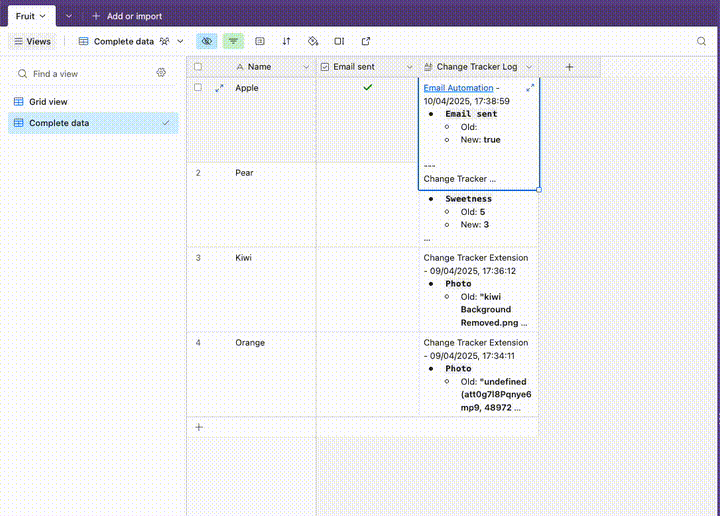
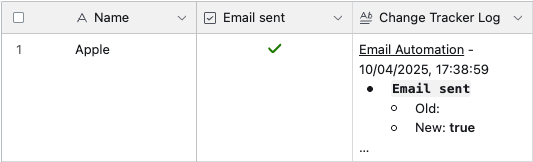
- A change log field for each record, capturing updates made by automations:
- A clickable link to access the specific automation
- A timestamp marking when the automation executed
- A detailed comparison of old values and new values altered by the automation
The change log will feature:
Let's get started!
You can follow along this tutorial by duplicating this example base. Click here to open the Fruit base.->

In this example, we'll work with a fruits table to track updates. Our goal is to email ourselves once all information for a fruit is compiled and then mark the "email sent" field.
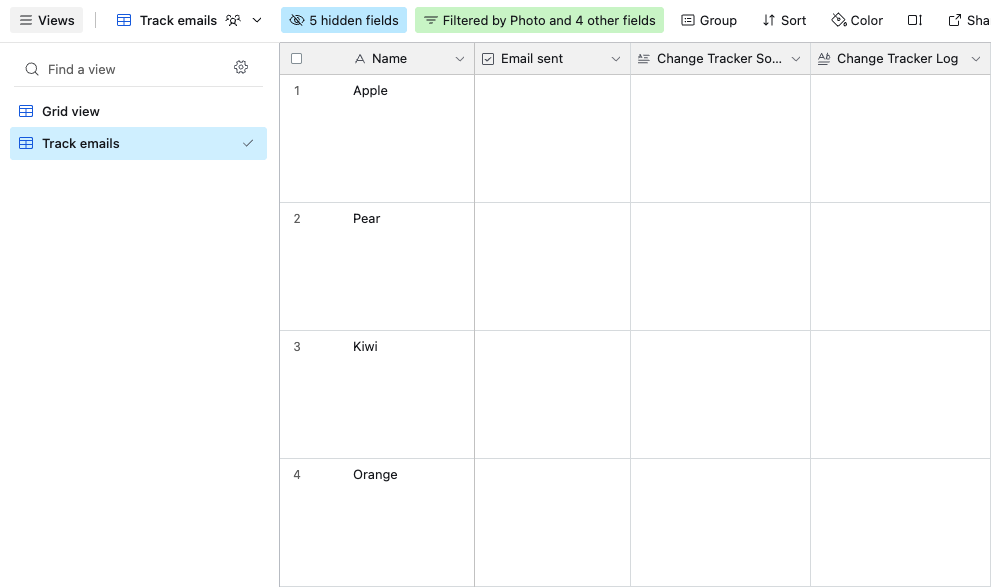
First, create a new view named "track emails" and hide all fields except "email sent," as this is our focus.
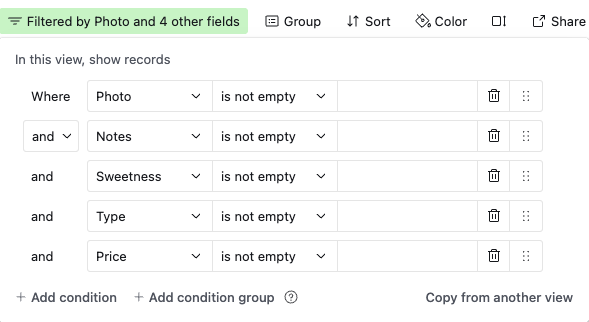
Next, set a filter to display only records where all fields are not empty. This ensures we only see records with complete data, ready for emailing.
Then, create two new fields:
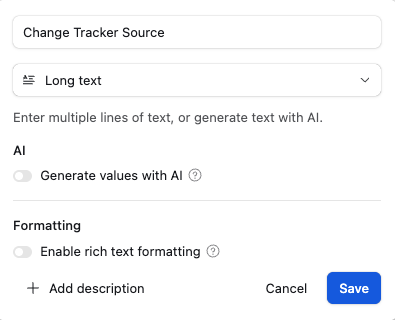
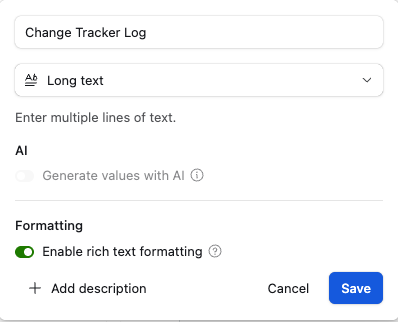
Long textfield – name this "Change Tracker Source"Long text field, with ✅ rich formatting enabled — named this "Change Tracker Log"
Now, we'll set up the automation to track changes.
Automation setup
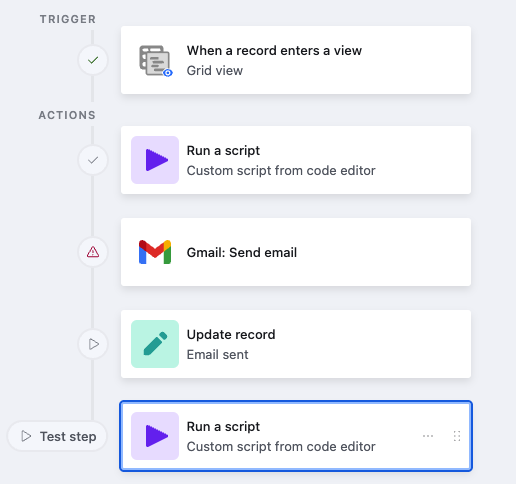
- Create a new automation named "Email Automation".
- Set up trigger: activate when a record enters the "track emails" view.
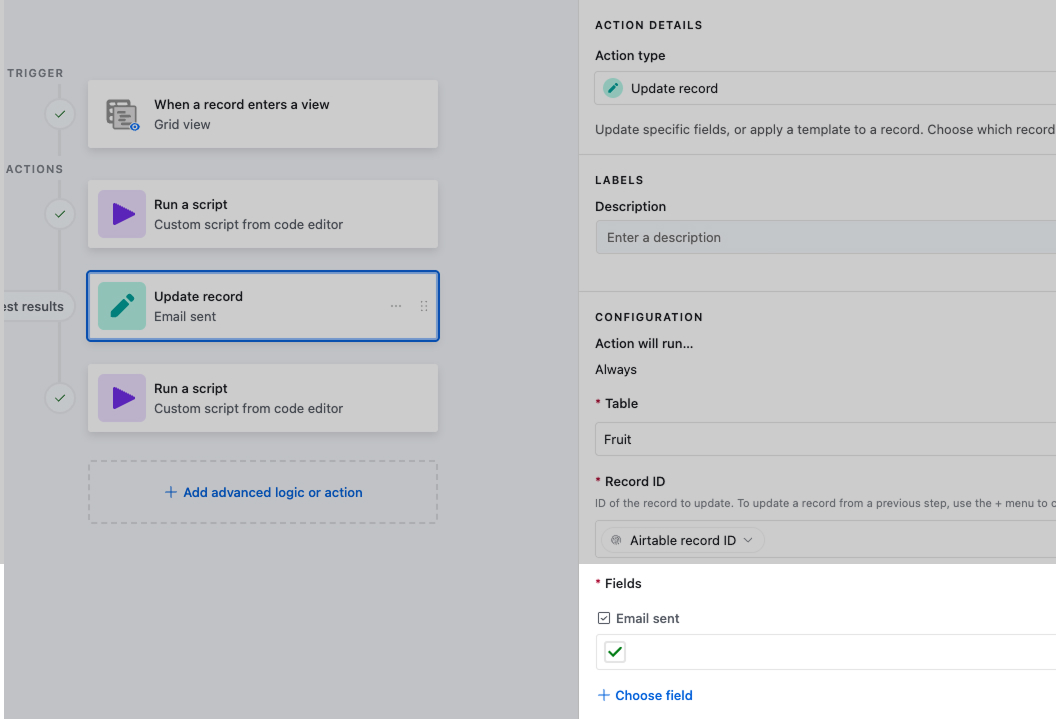
- Add a script action.
- Add an email action.
- Add an update record action.
- Add another script action.
With the steps done, go to the "Generate script" section at bottom of this page. Fill in the form:
- Table Name: Fruit
- Field IDs
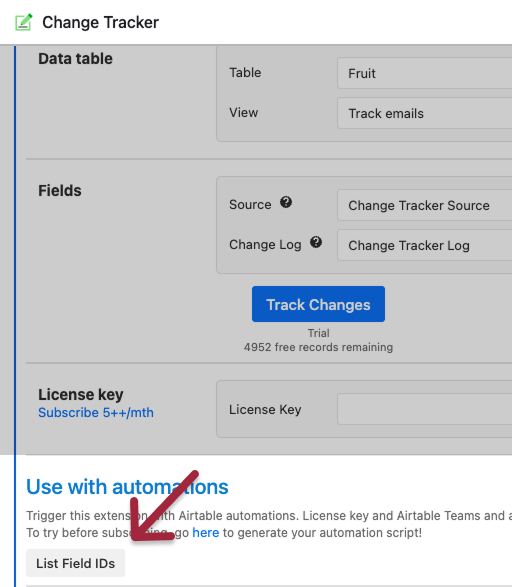
- in Airtable extensions marketplace, find "Change Tracker"
- Select the table & view you want to track
- Scroll down to "Use with Automations"
- Click "List Field IDs"
- copy the comma separated IDs generated
- paste it into "Field IDs to Track"
- There are 4 field IDs generated, because we have 4 visible fields in our current view.
- Copy the last two field IDs - they represent
Change Tracker SourceandChange Checker Logfields that we created earlier. (The IDs are positioned according to the position of the fields in the table.) - Paste them into the Source Field and Change Log Field fields respectively
- Copy the 2nd field ID, this should represent "Email sent"
- Paste it into the
Field IDs to Trackfield - The 1st ID is name, which we're not interested to track, so we'll not copy it. In the event that you want to track multiple fields, you can copy the fields into the textarea.
- Update Change Log field
- Toggle off: Make sure toggle is kept off
- License key
- Enter Gumroad license key, or use free trial
- Click Submit and copy the script
Return to Airtable Automations.

- In the first script action, click "edit code" and paste the script.
- In the Variables > Inputs section on the left, add
recordIdwith the value as the Airtable record ID.
Repeat for the second script action but toggle the "update change log field" on and copy the new script
- Paste this script into the second script action editor.
- In the Variables > Inputs section
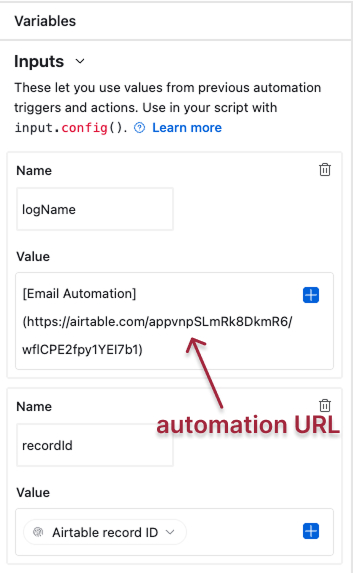
- add
recordId - add
logNamewith the value:[Email Automation](https://airtable.com/appvnpSLmRk8DkmR6/wflCPE2fpy1YEI7b1/waccEkizZuG2TA9VM)- copy the link of this automation from the browser's URL bar
- this is markdown syntax, feel free to customise your own name here
Finally, in the "update record" action, set the "email sent" field to mark as sent.
(For demonstration, we're skipping the email sending step.)
Test the automation
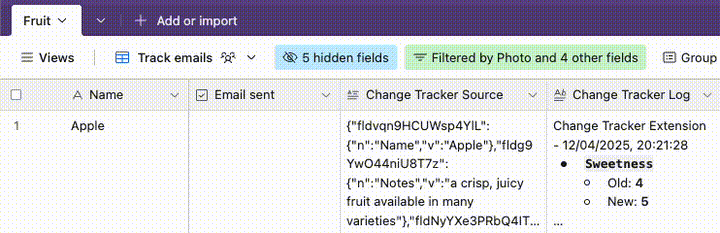
You should notice the "email sent" field will update, and the change tracker log will reflect this with a timestamp and a clickable link to the automation page, showing the "email sent" value change from empty to true.